Optimisation
For your object to work well on the web we need to consider optimising it for fast download, much as you would a large image file. In testing with three.js we have found that to target fewer than 65k vertices (the points that make up your object's mesh) is desirable for performance reasons. It is also more than enough usually to have sufficient detail if you are willing to create a normal map to describe the surface as opposed to using the mesh itself.
We will illustrate the optimisation process using another model, but the principles are the same. This video is also an excellent overview of normal map creation, however, it does not go into enough detail for an object that has been produced in PhotoScan.
Imported Object
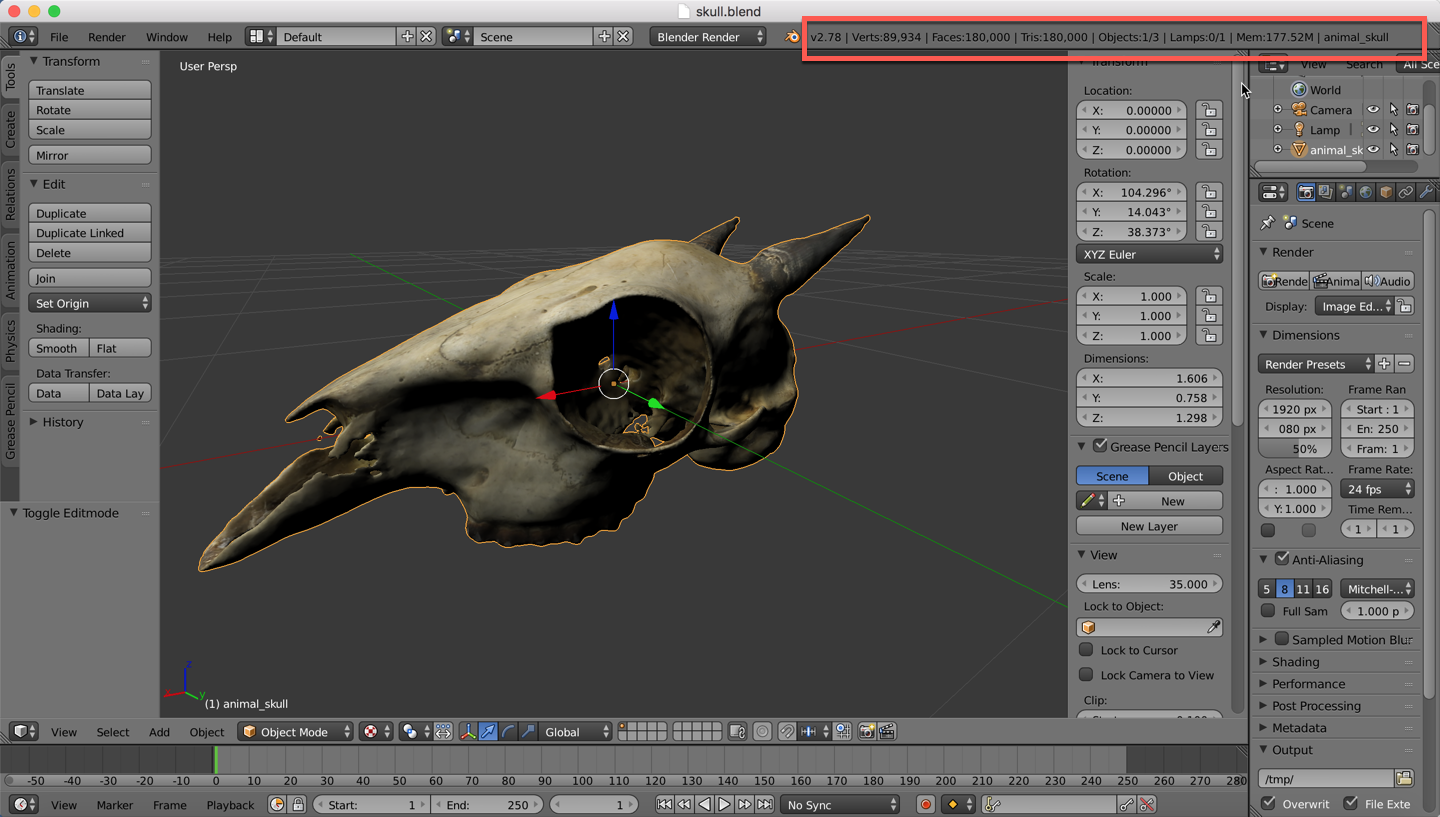
.obj file imported to Blender (before optimisation): 89,934 vertices
Desired outcome (after optimisation): <65,000 vertices.
Decimation
In Object Mode select the model and press Shift + D to duplicate the object:
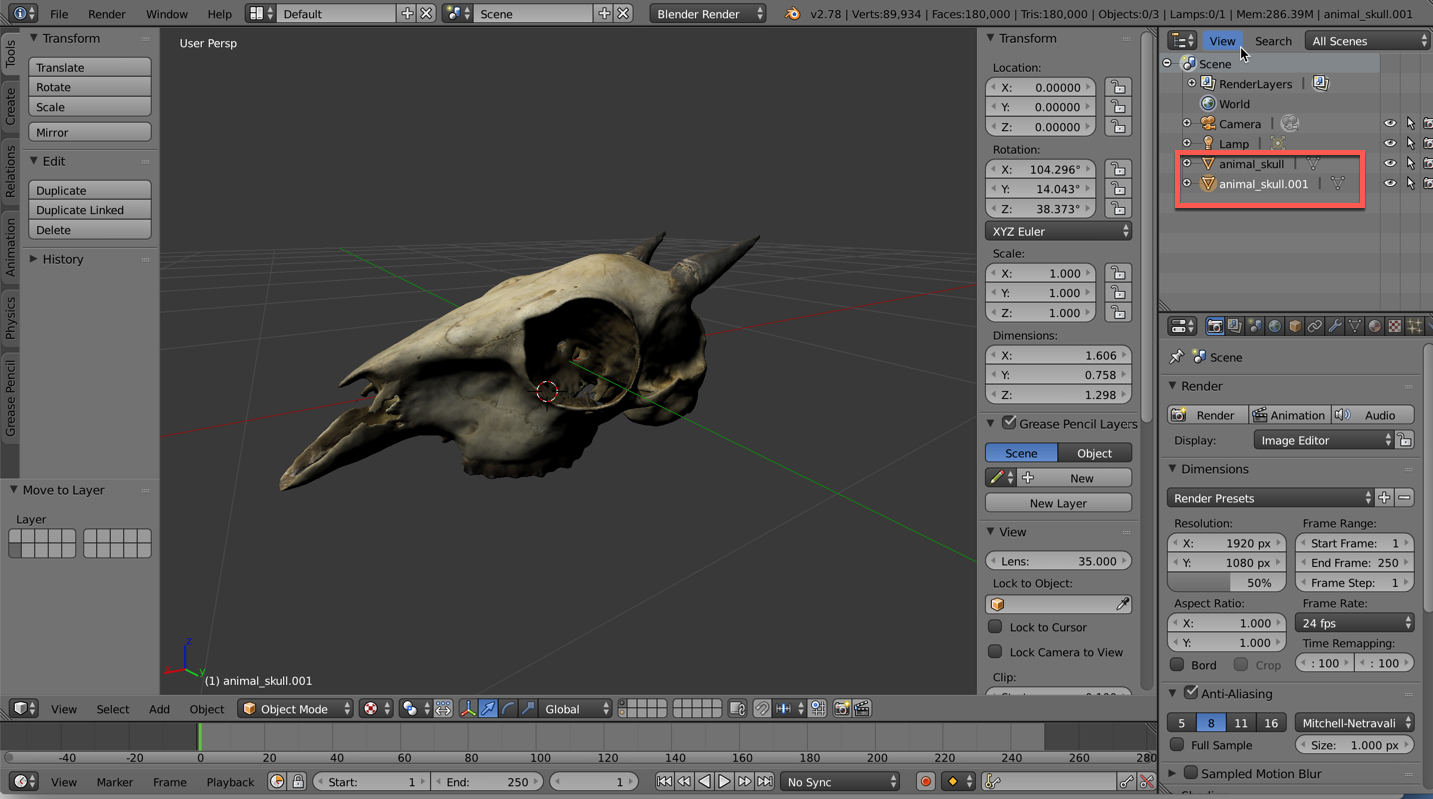
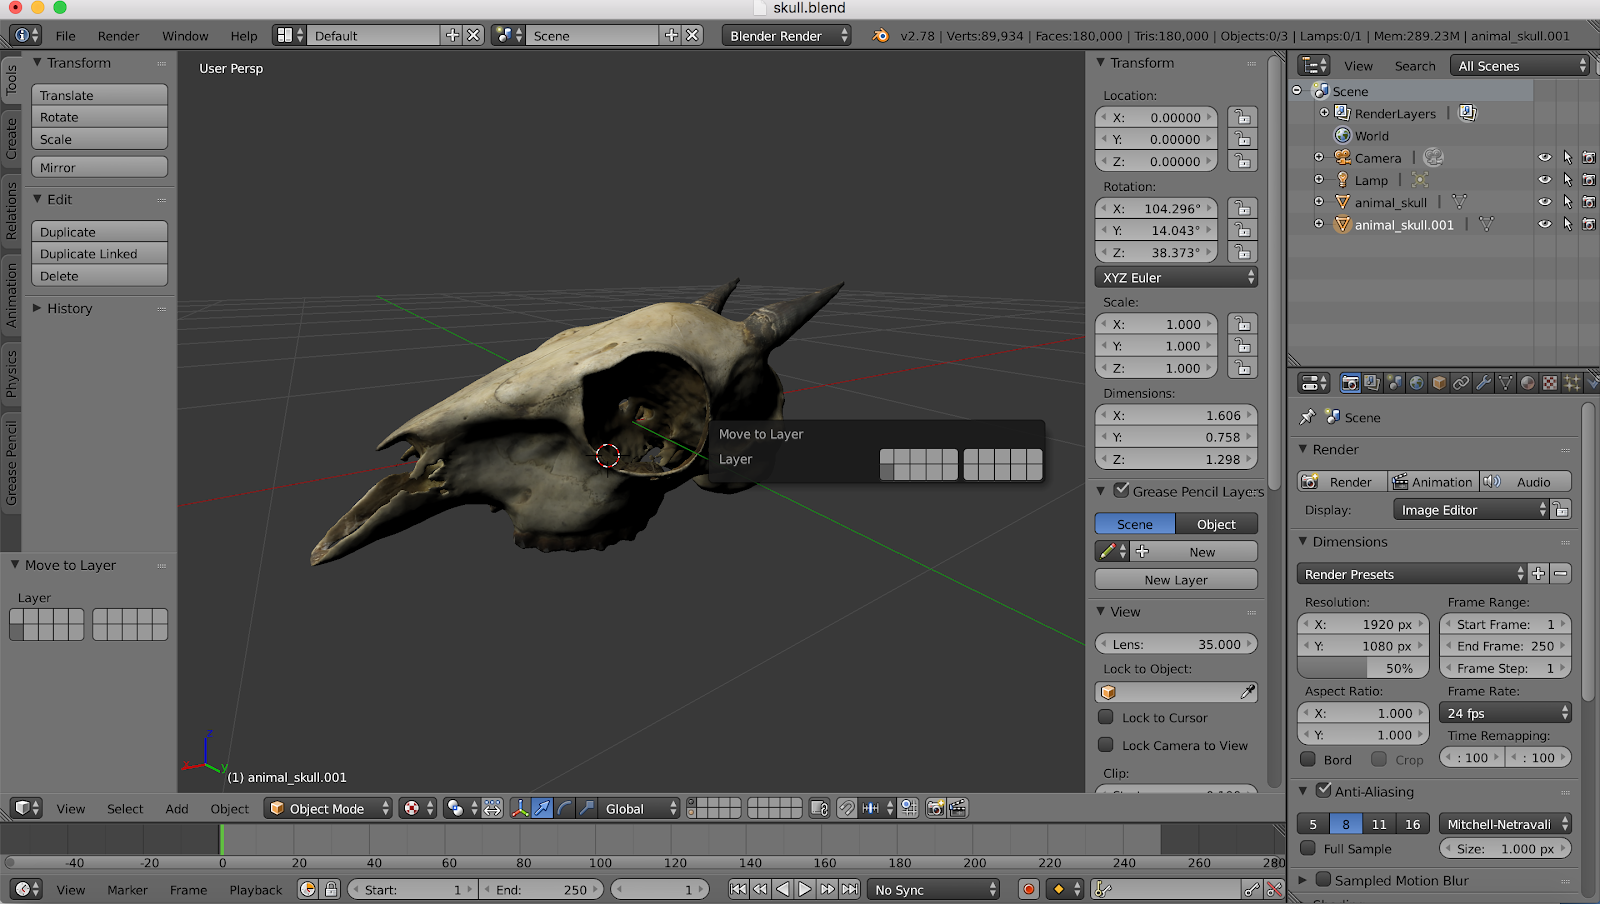
For the following stages you need each object on a separate layer. With the duplicate object selected press M to move it.
Now we are going to reduce the number of vertices in the duplicated model. We are aiming for under 65k vertices.
To reduce the number of vertices, you will need to add a decimation modifier to your object. In the properties panel on the right-hand-side of Blender, select the spanner icon, then ‘Add Modifier’, and ‘Decimate’.
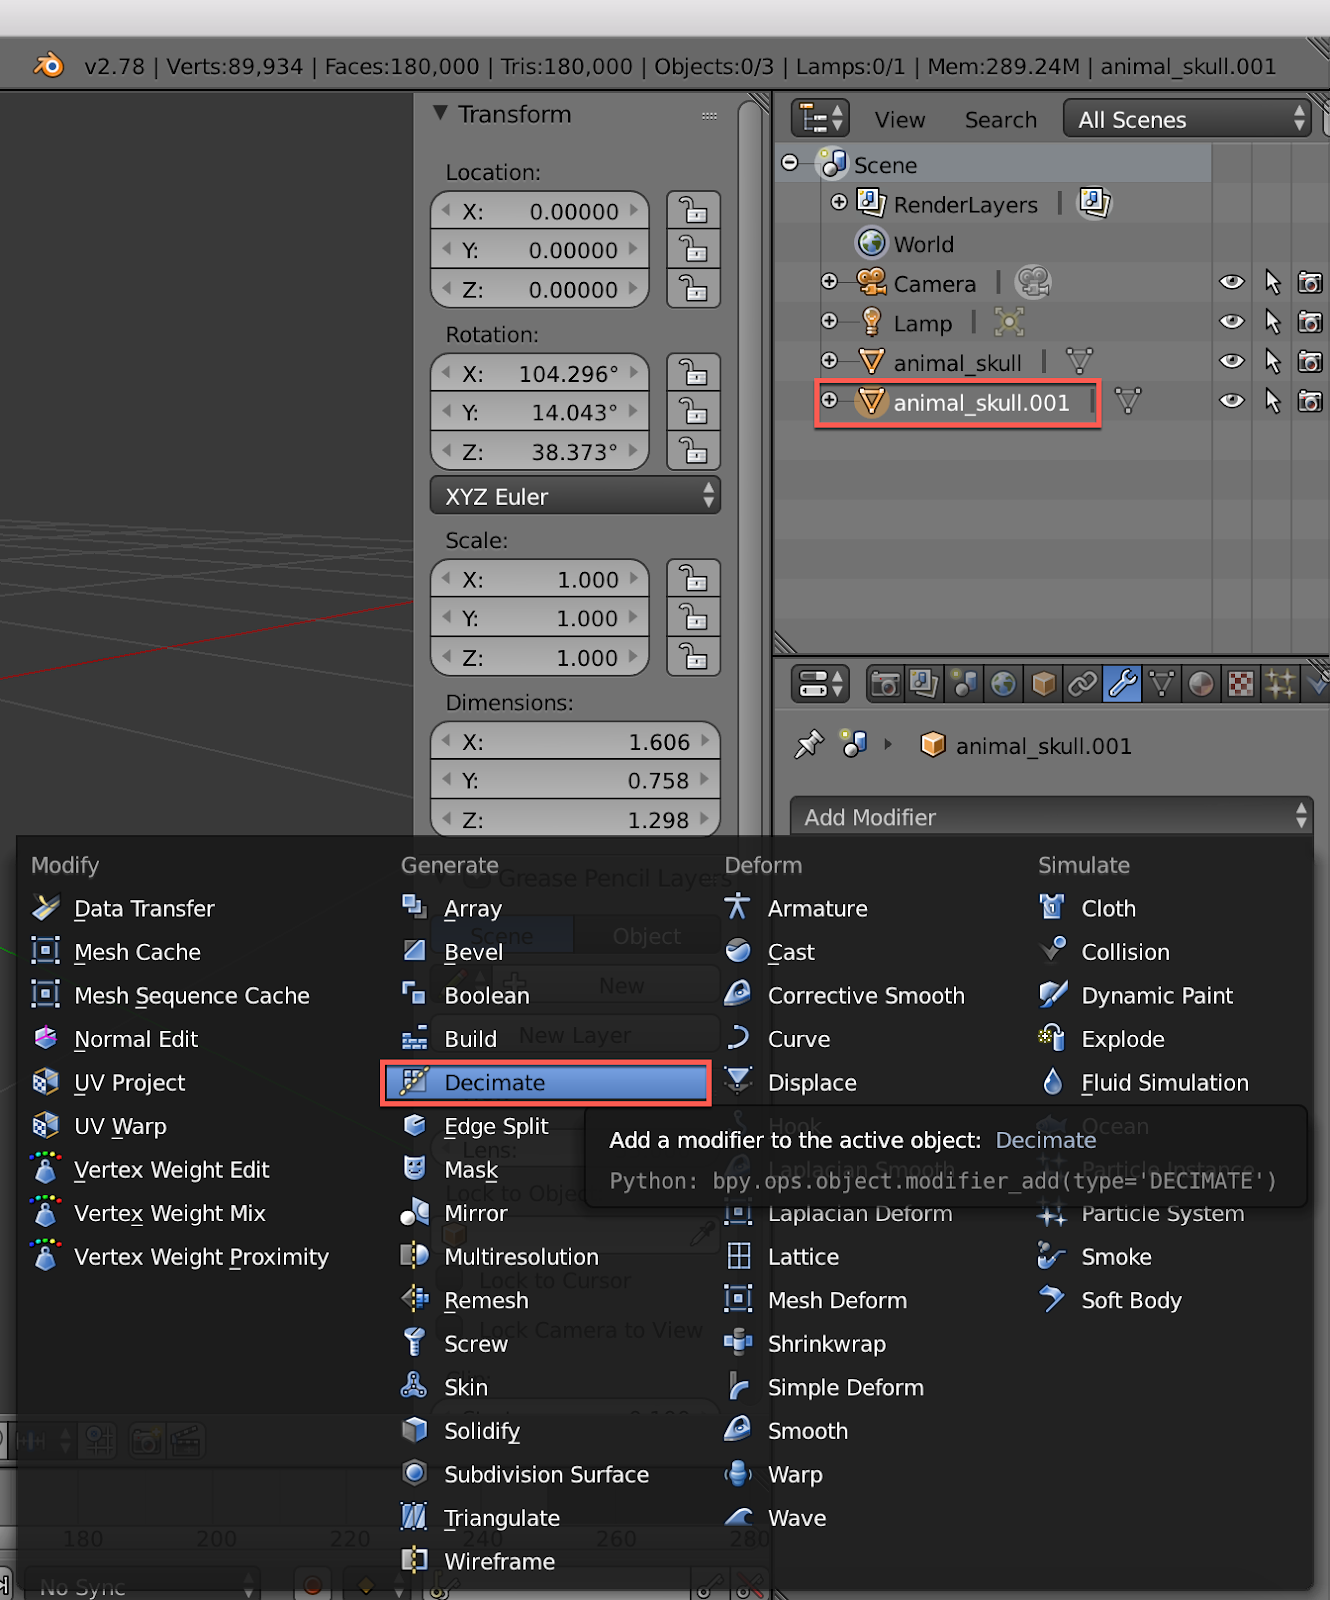
Click on ‘Ratio’, and type in numbers e.g. ‘.7’ until the face count is within the desired range.
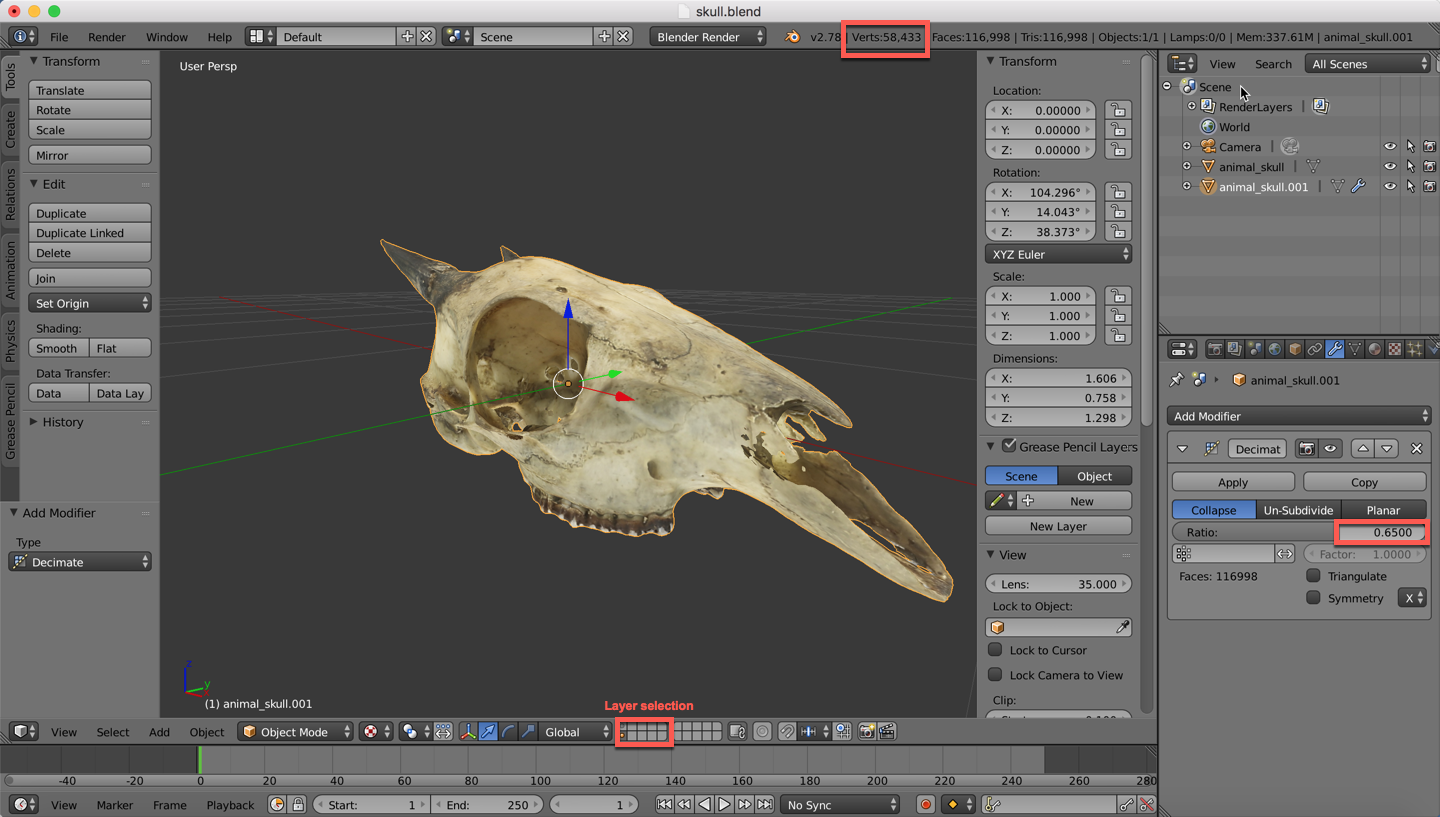
Click ‘Apply’ to apply the decimation to your low-poly mesh.
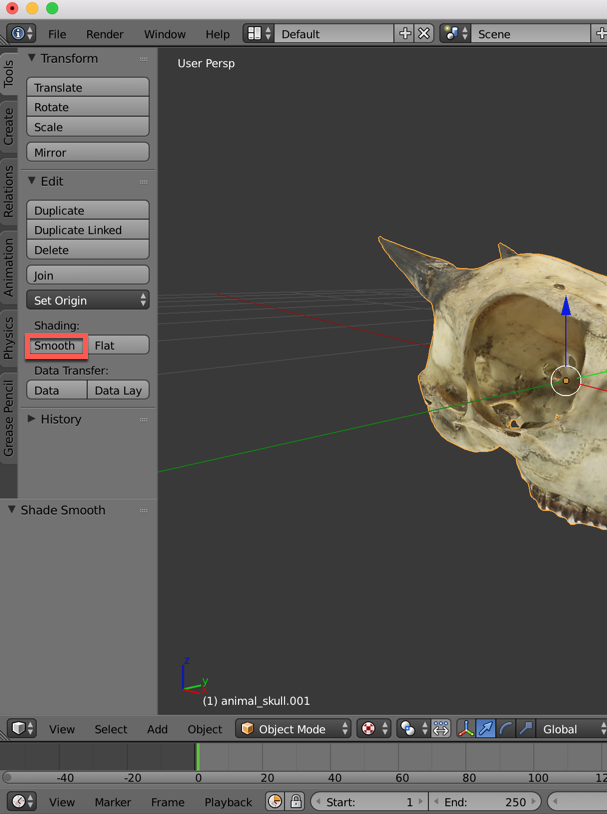
To ensure that your model remains smooth in appearance, select 'smooth shading' under Tools > Edit > Shading
We will now refer to the duplicate model with the reduced number of vertices as the ‘low-poly’ model.
Creating a normal map from the high-poly model
Create another window in Blender by selected the grey corner tab and dragging it to the left:

Right click on the low-poly model to select it.
In the second window open UV/Image editor:

At the bottom of the UV/image editor select 'New':

Name your file 'model_normal' and use the default settings:

In the window on the left go to Edit mode and press Ctrl + U to bring up a menu. Select 'Smart UV Project'. Use the default settings in the window which will appear:

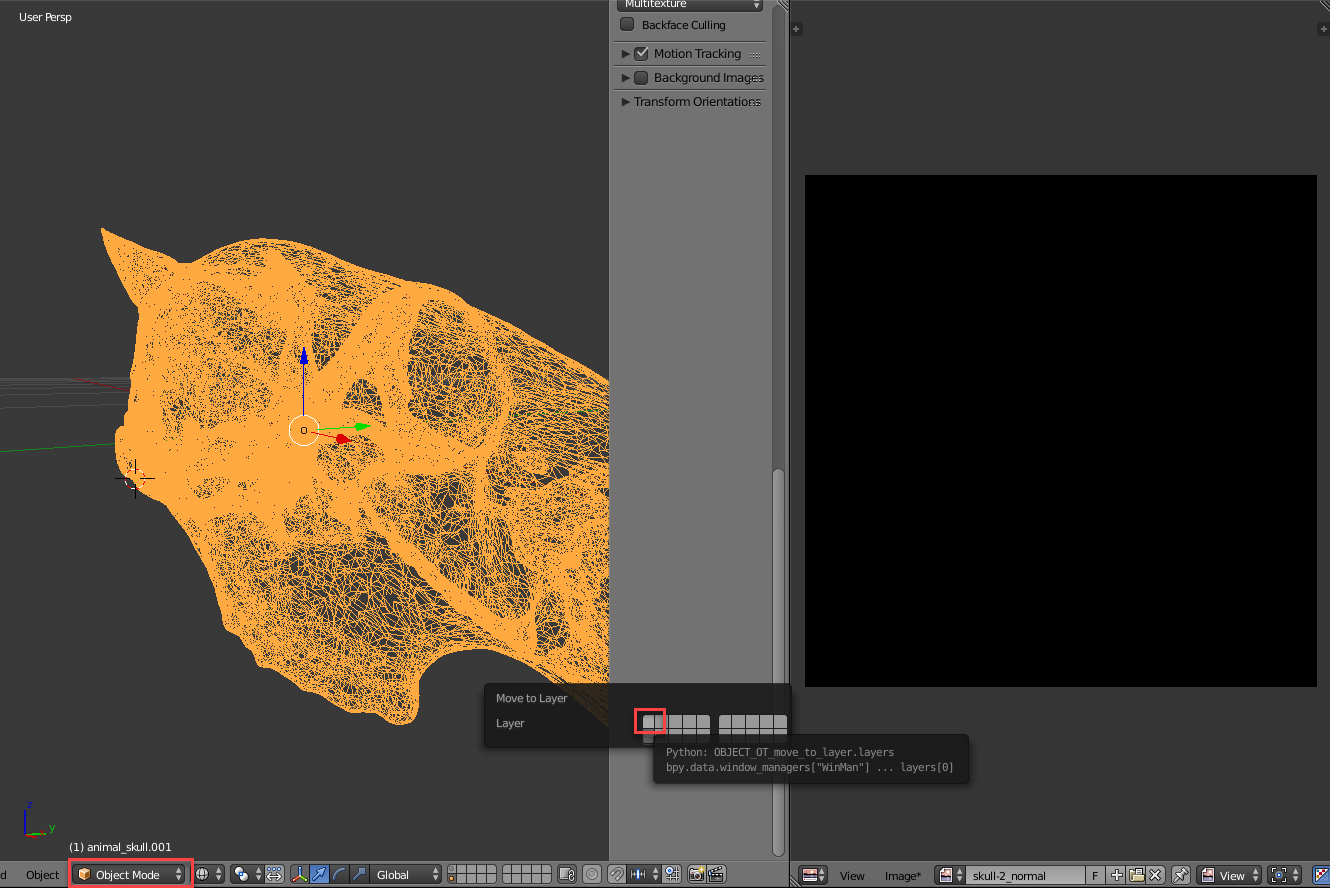
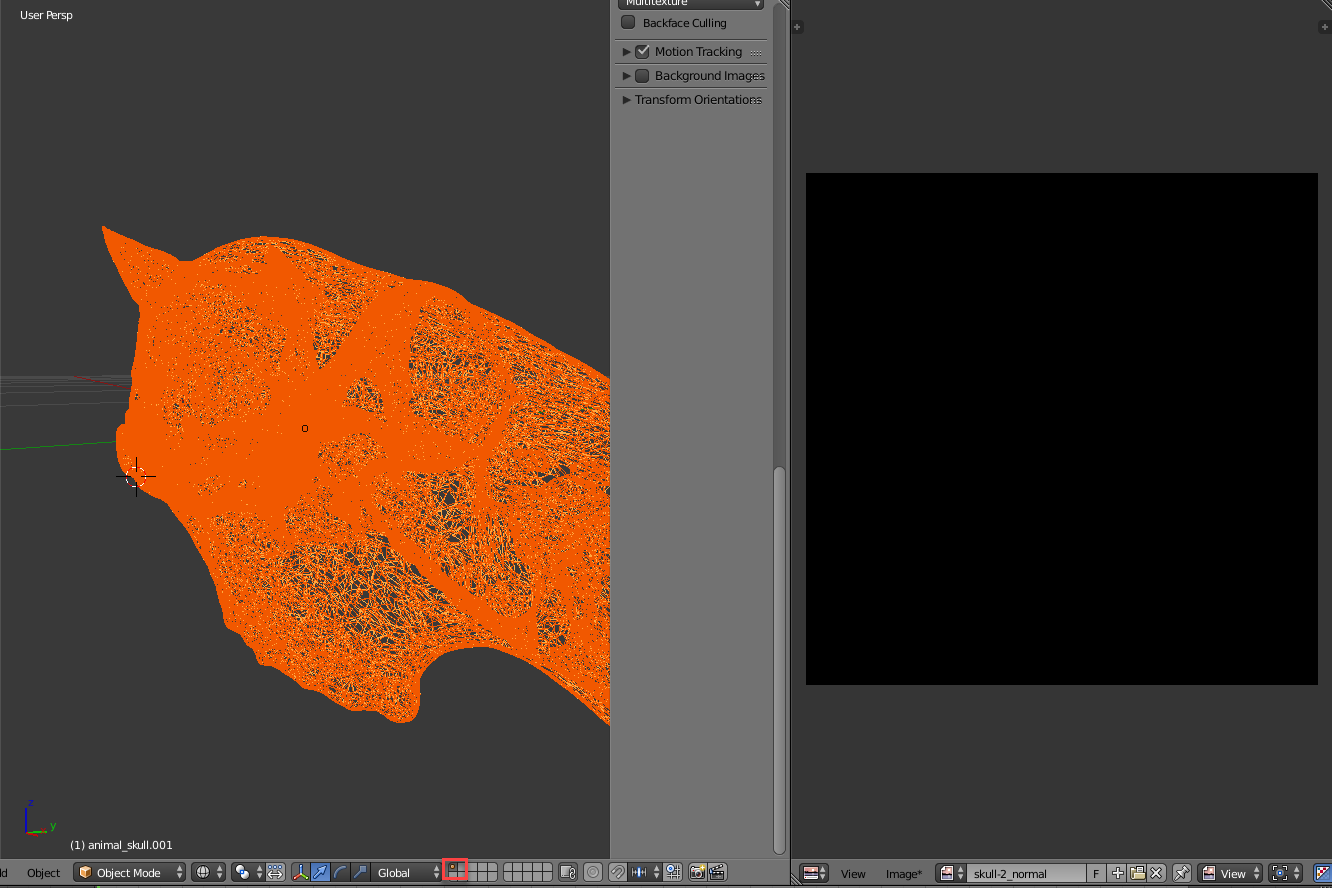
Go to object mode and press M to move the object to the first layer:
Return to the first layer. Now you have two objects layered over each other in the same layer:
For the next stage to work it is essential the objects are layered in exactly the same position.
Right click on the high-poly model, and hold shift and right click again to select the low-poly model:

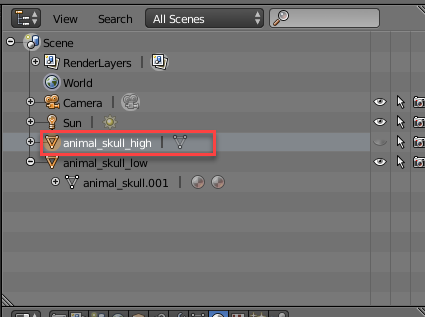
It is useful, but not necessary, to rename your objects to 'model_high' and 'model_low' in the Scene Hierarchy. Here you can see that the objects are selected. The high-poly model has an orange icon background, and the low-poly model is highlighted in white.
In the properties panel, go to the render tab (the camera icon) > Bake > and from the ‘Bake Mode’ drop-down select ‘Normals’
Ensure 'Normal Space' is set to ‘Tangent’.
Check ‘Selected to active’. This means that that selected mesh (highlighted in orange) is being baked to the active mesh (highlighted in white).

Click ‘Bake’.
You should see something like this in your UV/Image Editor window:
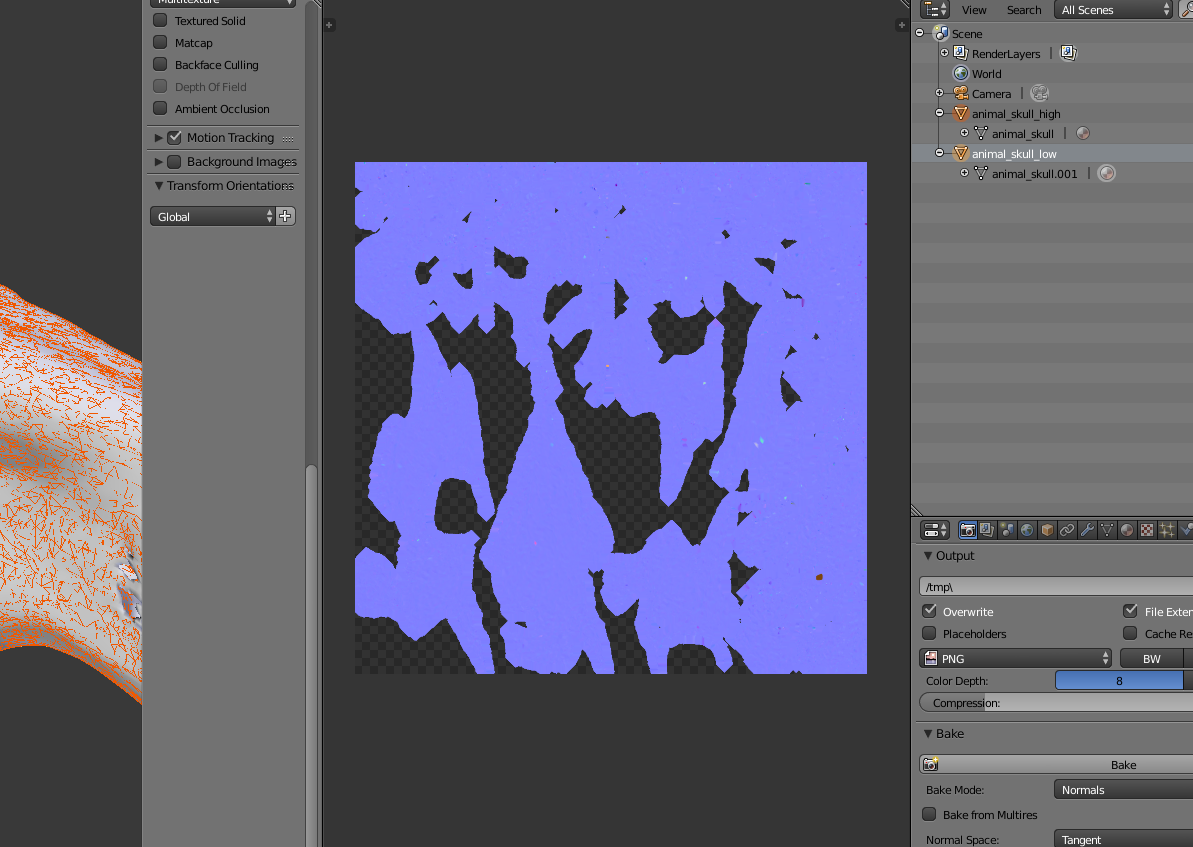
This is your generated normal map texture.
Save your image:
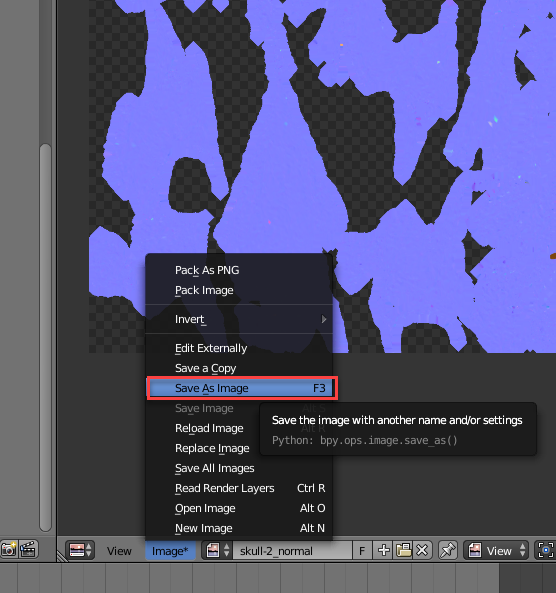

It's good practice to name your file 'model_normal.png'.
Now we need to assign the normal map to our low-poly object.
Right click to select the low-poly object.
Go to the Material tab, and add a new one material slot:
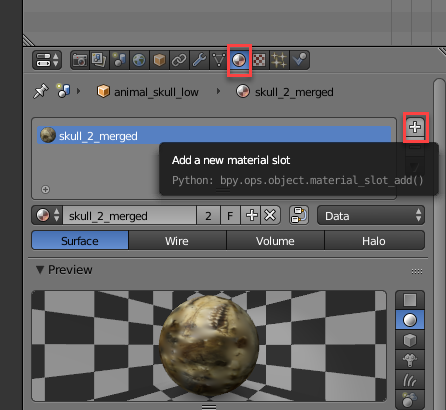
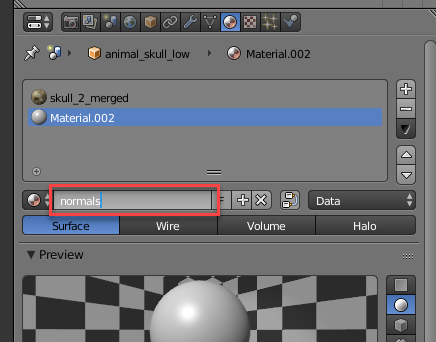
Now click ‘New’ to add a new Material:

Name it something like ‘normals’ and press Enter:
Now go to the Texture tab and click ‘New’:
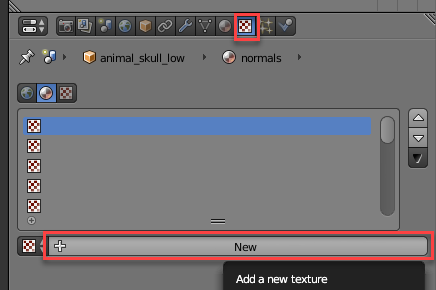
Again, name it something like ‘normals’.
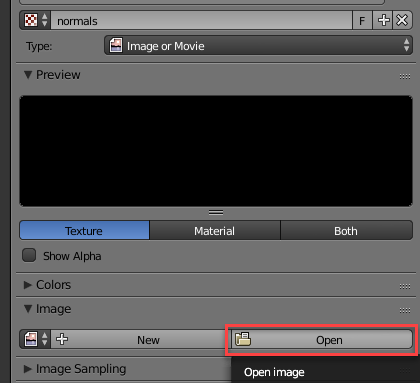
Select Type ‘Image or Movie’:

Under Image, open the normal image you just saved to disk:

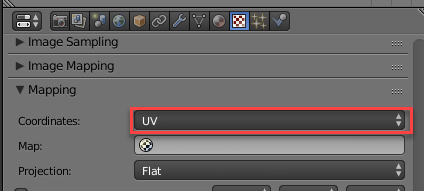
Expand the Mapping section, and for Coordinates, select UV:
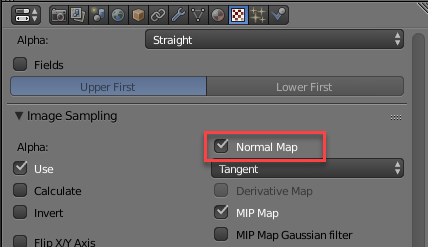
Expand the Image Sampling section, and select Normal Map:
Expand the Influence section, uncheck Diffuse > Color, and Check Geometry > Normal:

Creating a Diffuse Texture
We now need to ensure that our low poly model has a diffuse texture UV mapped to it.
In the UV/Image Editor, click the plus icon to create a new image:

Name it 'model_diffuse' and use the default settings.

Switch to Edit Mode, and you should already see your model UV mapped to the new image:

If you don’t see a black background, ensure your new image is selected:

Switch back to object mode, and right click on the high-poly model, then shift right click to select the low-poly model too.
Go to the Render tab and under Bake select Bake Mode: 'Textures', and 'Selected to Active':

Click 'Bake' and you should see something like this in your UV/Image Editor:

Select 'Save as Image':

Name it 'model_diffuse':

With the low-poly model selected, go to the Material tab and create a new Material. Name it ‘diffuse’:

Now switch to the Texture tab and click 'New':
Select Type: 'Image or Movie'.
Under 'Image', open the diffuse image we just saved to disk:


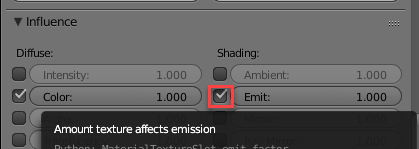
Under Influence > Shading, select 'Emit':
Switch to Object Mode. With the low-poly model selected, under the Material tab, delete the high-poly diffuse material:

Right click on your high-poly object in the Scene hierarchy and click 'Delete':
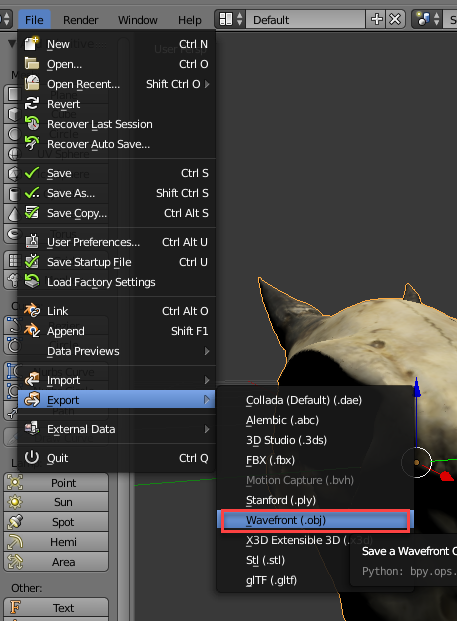
Go to File > Export > Wavefront (.obj)
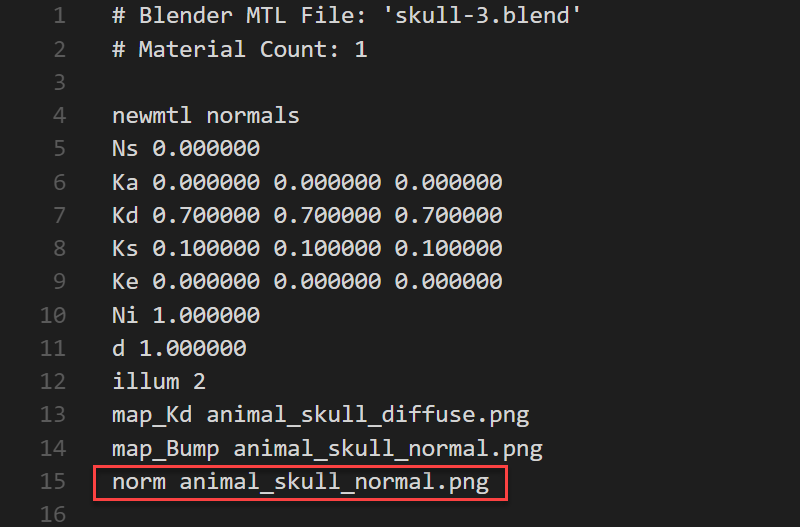
This will generate an obj file and a mtl file referencing your generated normal and diffuse images. Here’s what your mtl file should look like:

In order for the normal map to be detected by three.js you need to add an extra ‘norm’ key at the bottom: